[ad_1]
Yes, I am a fan of Windows running on ARM64 hardware. I have a few existing ARM64-based devices, including a super-underpowered one, a surprisingly powerful M1-based Mac Mini that runs Windows ARM64 very well in VMs, and a laptop that has become my travel companion when I want to have a full day of battery life in a lightweight package. So when Project Volterra was announced, I knew that I wouldn’t be able to resist buying one. So as soon as availability was announced along with the boring name of the “Windows Dev Kit 2023,” I placed an order. While expedited shipping was a little disappointing, it did eventually arrive. After having it sit in the box for a week or so (“real work” getting in the way), I finally got around to unboxing it and setting it up.
Let’s start with the packaging. There’s little doubt that this machine and its packaging were the creation of the Surface team. At least this isn’t “pretty box inside the shipping box” — no, it’s just a pretty box, on the inside at least. On the outside, it’s just another box:

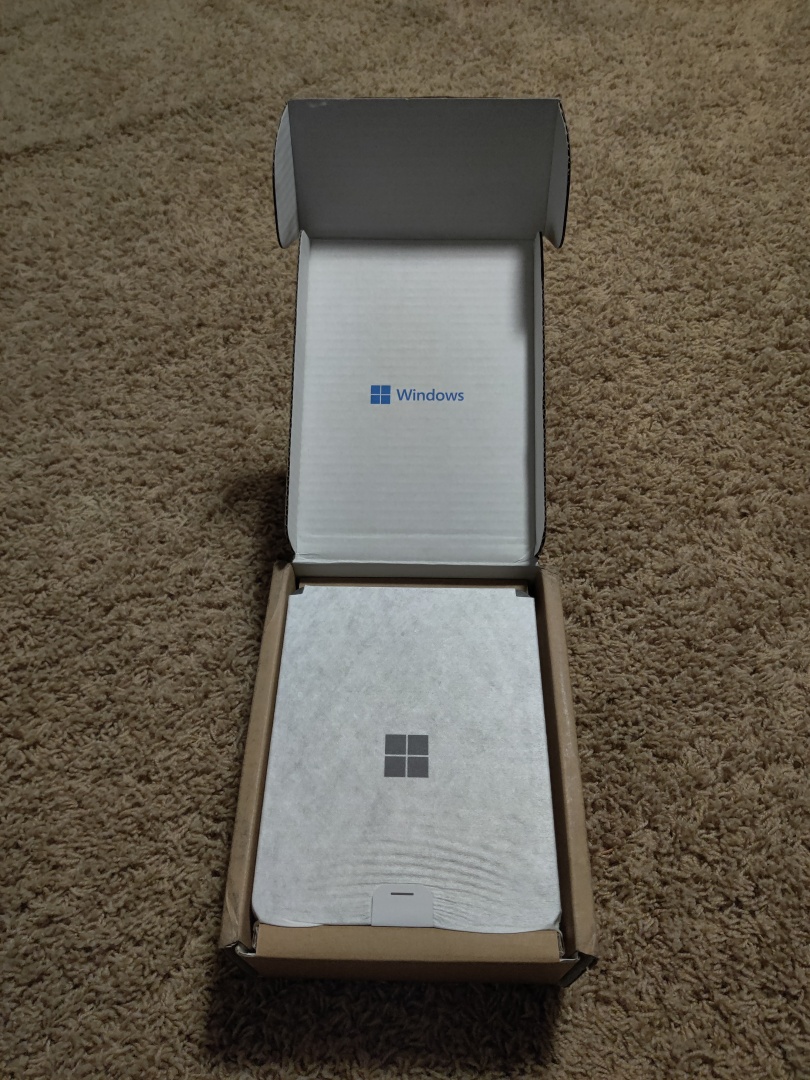
When you open that box (a trivial exercise, just pull a tab on the seal and it tears right off — no cutting required), you see the prettiness:

So a blue Windows logo on a white cardboard background, and the Volterra desktop (forget that awful name) wrapped in a white synthetic cloth pouch with another logo on it. (The rippling toward the bottom is likely just due to the box being jostled, looks like it slid a little in the sleeve.) When you pull that out of the box using the small tab at the bottom, you see another small box underneath containing the power supply (no, it’s not USB-C powered).

The tab is actually connected to a card that explains the ports and buttons on the machine, which is useful:

Here we can see the signs of this being targeted at developers (including hardware/firmware developers). Who else would need buttons that are designed to boot into UEFI or from a USB key? (Maybe I give them too much credit as this could be easier to implement than having the firmware handle this through an attached USB key. Regardless, I like it.) The power button is on the left side, toward the front, so it’s the easiest button to find.
From a port perspective, there are two USB-C ports on the side, and three USB-A ports on the back. There’s also an Ethernet port, a mini-DisplayPort connector (ugh, more on that later), and the power connector. The USB-C ports also support video, as described in the online setup documentation.
The provided power supply supports the standard international range of voltages, with a “pigtail” for the actual plug so it shouldn’t be too hard to find other pigtails for other types of power plugs (or just use an adapter). (Again, too bad it isn’t USB C-powered.)
Before turning it on, I had to open it up to check out the insides — at least as far as I could go without doing any damage. The bottom cover is removable with four screws, at which point the bottom comes off easily.

Toward the bottom left of that picture, you can see the M.2 NVMe drive; pretty much everything else is hidden by the upper layers, so I had no desire to go any deeper. (There’s no warranty to void, so feel free to dig in yourself.) It would be reasonably easy to replace the M.2 drive with a different 2230 drive (a pretty “short” 30mm card); it might be possible to do a longer drive, just not obvious if there’s an easy way to secure it (it might be possible to secure a 2280 card with the screw hole toward the top left). Fortunately, the provided 512GB drive is likely sufficient for most use cases.
OK, so now it’s time to connect it up and turn it on. My ideal setup for video is slightly unusual: I connect multiple devices via HDMI to a KVM, then that KVM through a USB video capture device, and then that video capture device output to a 1080p display. I connected the Volterra to an available KVM port using an HDMI to Mini-DisplayPort adapter and turned it on — no video. I bypassed the KVM and connected it to the HDMI-based USB video capture device — still no video. After some crawling around I connected it to a different monitor (4K) that supported Mini-DisplayPort directly (so no adapter required) and that worked fine. Reading through the setup docs, I suspect this is the issue:
- If connecting an HDMI monitor to the mDP port, an active mini-DP to HDMI adapter is required.
I don’t happen to have an “active mini-DP to HDMI adapter” laying around, so I couldn’t verify this, but it does seem somewhat logical. (Maybe I need to get a USB-C KVM…) I could then set up the device, which came with Windows 11 Pro 22H2 preinstalled. I set it up with my Microsoft account without issue (although I forgot how many extra OOBE screens have been inserted, including one with a default button that would sign you up for a $1 Xbox Game Pass subscription, presumably going up to the normal price after the first month — I didn’t read the fine print, just made sure I didn’t click that button).
After I was signed on and at the desktop, I got distracted and the computer either turned off the monitor or went to sleep. The power light was on, so it looked like it was awake, but there was no video output. Pressing keys and moving the mouse didn’t wake the device up. Eventually I noticed that the KVM (still connected to the device for the USB keyboard and mouse) wasn’t getting a USB signal, so I pressed the power button on the side of the device. That woke it up, the KVM light came back on, and the video reappeared. (How hard would it be to have a flashing light to show that the device is asleep?)
So now I can poke around a little. Gigabit Ethernet, Wi-Fi 6E, 8-core Snapdragon 8cx, Bluetooth, pretty much as expected. It also shows that the M.2 drive (which is conveniently covered with a Windows logo sticker so you can’t see that on the physical drive) is a Kioxia KBG40ZNS512G BG4A device, which looks like it’s a PCIx Gen 3 drive with less-than-stellar performance. (For comparison, Samsung 980 NVMe drives can get double the benchmark scores, so it looks like there may have been some cost-cutting here. (If you want faster, you can always replace it…)

Yes, the model of the machine is really “Windows Dev Kit 2023”.
Notice that there is Hyper-V support, so you can create ARM64 VMs, which is great for development and testing. I did create a VM and tried to PXE boot it to an ARM64 Fedora 36 Linux boot image, but that didn’t go very well, it crashed with a “Synchronous Exception at 0x00000000DFDDBD50.” No idea what that means, but that’s a problem to deal with at a later time. (I had better luck with VMs on my M1 Mac Mini.)
As with all machines, I had to check out the firmware configuration too. Not surprisingly, it’s just like any other Surface device.


It even includes the “Swipe left” instructions to do a one-time boot, although I have no idea how you would ever pull that off on a device that doesn’t have a touchscreen (doing it with a USB mouse is an impossibility — no idea why PC firmware can’t do a better job of working with standard mice). Fortunately, there’s a button to do the same thing, although those buttons are hard to find and press because they are flush with the case (unlike the power button, which sticks out a little).
So how does this device physically compare to other devices? I’ve added it to my growing stack of “mini-PCs” so that you can see the differences.

So let’s walk through that stack, starting at the bottom:
- M1 Mac Mini. This is the biggest device overall, but it’s still not really that big. (It doesn’t like my video setup either, with some annoying screen flashing, but I was able to work around that problem with an HDMI EDID emulator plug/adapter.)
- Dell Optiplex 5080 small-form-factor PC (a 10th generation Intel-based device). It’s only slightly smaller than the M1 Mac Mini.
- Project Volterra. While this is just as wide as the M1 Mac Mini, it’s not quite as deep (more rectangular than the other two devices, which are pretty much square) and not as tall as either of them.
- Intel NUC (7th generation Intel i5-based device). When it comes to size, it’s hard to beat the Intel NUC devices.
- Apcsilmic DOT1 Mini PC, another ARM64-based machine, this one running a Qualcomm 7c — basically, the equivalent of a cheap Android phone, but running Windows 11. It’s cheap, but really targets more IoT/kiosk scenarios due to its much lower performance. Read my review of that one for more details.
Overall, I like the Volterra form factor and appearance better than the rest of the devices. (Heck, if Microsoft would release an Intel-based Volterra box I’d buy one of those too, replacing the aging NUC box. But I suspect that’s not high on their priority list.) It’s a nice device, for the target audience: developers (and perhaps IT pros) that want to ensure their software works fine on ARM64 devices.
I haven’t put the device through any performance testing, but given that I’ve been happy with the Samsung Book S performance and that’s running an 8cx Gen 1 processor, I would expect this device to perform well. With the native version of Visual Studio now available for ARM64, performance for dev-related tasks should also be decent. I’ll have to try all of that out later, time to get back to real work.
I believe the real choice is between a Project Volterra device and a Mac Mini where you can run Windows 11 in a virtual machine. The performance in the Mac Mini VM is still better than an 8cx Gen 3 CPU. Where the Volterra wins is on price: getting a similar memory/disk configuration in an M1 Mac Mini will cost you a couple hundred dollars more (even if you pick up refurbished M1 Mac Minis directly from Apple at a discount).
[ad_2]
Source link


